Aligner glossary – 15 terms you need to understand

Aligner, clear aligner, invisible braces, orthodontic aligners, clear braces, invisible aligners …
They are known by many different names, and they come with their own terminology. In this article we will go through everything you need to know to better understand what they are and what’s involved.
Clear aligners are revolutionising orthodontics as a much more appealing user friendly replacement of fixed braces, which leaves you free to live your life and eat whatever foods you want without fear of staining or breaking your braces (you simply remove them for eating, drinking and even parties or first dates if you want).
Fixed braces are painful and uncomfortable and not great for your self image when your smile now includes a mouthful of metal (even when it’s white metal), especially as they tend to be fixed in place for 1-2 years, meaning all your photos for 2 years are with a mouth closed.
So let’s go through the different terms you need to be familiar with:
#1 Aligner
This is the clear plastic tray that is worn over your teeth. It is called an aligner NOT a retainer even though it looks very similar as it is different in one very critical and important way.
The aligner is made on a 3D printed model of your mouth with the teeth in a slightly straighter position than they are now. This is why when you put it in, it feels very tight. This tightness is due to the aligner material flexing to fit over your teeth in the current position, and the elastic force serves to push the teeth to the new position.
On the other hand a retainer acts passively as it is made on a 3D printed model of your current mouth position. So it is not moving the teeth but maintaining them into their current position. Aligners typically move teeth 0.2-0.3mm so they are programmed to move the teeth gently and safely to the new position stage, and the ideal feature of these aligners is that they can’t move the teeth more than that – the end point is safely programmed in, unlike fixed braces where if a bracket or wire was to snap, the teeth could be pulled out of position very quickly taking you not only off course from your new smile, but also potentially damaging the tooth if the brace isn’t repaired in time.
#2 Retainer
This is the clear plastic tray that is made on the final 3D position of your smile, the end smile position. This is designed to hold the teeth in the new straight position.
So why do we need a retainer? Well teeth move in response to constant forces, so the forces from the lips, cheek and tongue all conspire to push the teeth back into the old position. There are different types of retainer and the type needed depends on the types of movements that were completed.
Broadly speaking you can split retainers into two main categories
1) Fixed
2) Removable
1) Essix retainers aka clear retainers (that look similar to aligners)
2) Hawley retainers – plastic & metal based retainers
Essix retainers are great to maintain the teeth in position and help maintain the arch, but over time with wear and tear / grinding habits, they can lose their rigidity, this then can mean even though they still fit – the teeth can still move a little leading to mild relapse, and when you’ve spent so much time and energy straightening your teeth the last thing you want is a little movement. This is why it’s important to get new retainers to maintain the rigidity. Nothing lasts forever.
Hawley retainers are great to maintain teeth position but are quite ugly and many people don’t like to wear them, They are however very effective at maintaining tooth position.
#3 Aligner chewie:
This is a spongy springy aligner accessory that is used to bite (squeeze) between your teeth, the action of squeezing your teeth on it helps the aligner to seat (fit) into position. The reason the chewies are needed is the downwards pressure from biting helps squeeze the aligner into position thus moving the back teeth at the same time.
Why is this needed? Because as mentioned above the aligner is designed on a 3D model to fit the NEW tooth position (slightly straighter) not the current position. When moving front teeth they are quite conical and slender so the aligner can easily flex over it, but back teeth are more cubic shaped with tapering walls, this leads to difficulty on the aligner fully seating – and if the aligner isn’t fully seated then the tooth can’t move fully, so using the chewie to bite (squeeze your teeth) on a few times a day is a good idea to speed up and improve the quality of tooth movement.
#4 Aligner hook:
When the aligner is fitted in position, they fit very tightly, to remove them can be quite challenging if you don’t have a strong short nail to hook onto the back corner of the aligner and pull downwards. The hook is a plastic aligner retriever that can be used to engage the back corner of the aligner and then by pulling downwards you can pull the aligner comfortably out of position.
#5 3D simulation:
The 3D simulation forms part of your treatment plan and enables you to accurately visualise not just your new projected smile showing the final position of your teeth from multiple angles, but also it shows the actual route taken by your teeth, so you can see exactly the transformation in stages. This then helps you see the teeth movements from the front on views, side views, top down views to help you make the right decision for you. The 3D simulation is comprised of a sequence/set of 3D models which when used like animation frames show the teeth straightening.
#6 Treatment plan:
This is a document that explains all the elements of your proposed solution. It is not simply a before and after. A treatment plan includes a diagnosis, clarification, proposed solution as well as information on what will change and what won’t change, this is prepared by a dentist, and shows all the items to be aware of, including all risks and benefits before choosing to have orthodontic treatment.
#7 Teeth impressions:
The impressions are needed to generate your 3D simulation, and then later your aligners and can be captured in two ways.
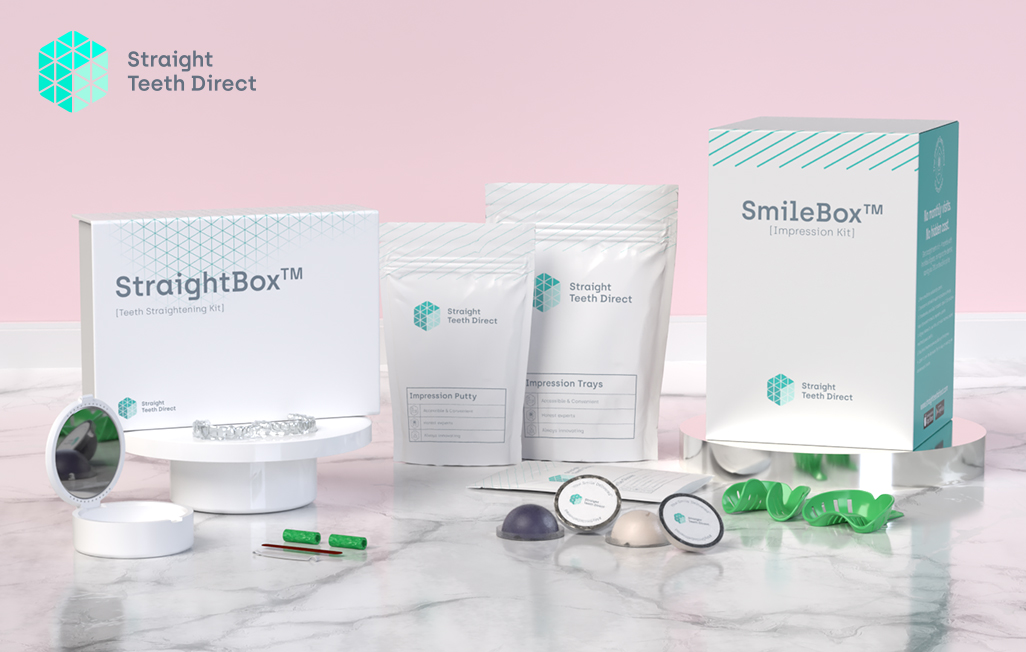
#8 Impression tray
The tray is used a plastic frame/shell that is used to fit inside the mouth and is loaded with impression material. There are different size trays and different tray shapes for upper and lower impressions.
#9 Impression putty
The other component of a manual impression is the putty. This is the soft moldable material that is placed in the tray and when pushed down, it captures the shape of the teeth and then sets hard retaining the shape.
#10 IPR:
This is an abbreviation for interproximal reduction. Interproximal means between the teeth, this is the process of a dentist using a polishing strip or small bur to polish between the teeth to create space for the teeth to move. IPR should only be done to a precise guide called an IPR guide, which shows the exact places and amount the IPR should be done. Typically it is done in 1-2 appointments and it is not painful but does feel weird. When done correctly it is perfectly safe and there is no risk or long term health issues.
#11 Aligner attachments
Aligners are clear and removable so they cannot grip teeth to pull them downwards or if a tooth is very small and conical it can be hard to grip. Attachments are composite “buttons” typically square or cylindrical precisely applied by a dentist using a filling material to the teeth. This then provides little areas for the aligner to clip onto and thus move the tooth in difficult movements. Attachments need to be removed at the end of the treatment by drilling / polishing similarly to brackets. Straight Teeth Direct™ aligners come without attachments and without IPR 🙂
#12 X-ray
This is an image used to view the teeth roots and bone, radiation is used to capture this image, typically in dentistry there are small x-ray images (for looking at teeth in detail for decay, gum disease etc) and larger x-rays like OPGs for looking at the whole jaw and full teeth roots.
#13 OPG
OPG stands for Orthopantomography and is a larger x-ray image showing a panoramic view of the full upper and lower jaws, all the teeth roots and bone level. It is good to identify any hidden / missing teeth but is not used to accurately spot decay.
#14 BPE
BPE stands for basic periodontal exam – the mouth is split into 6 areas (sextants) – 3 upper and 3 lower – the BPE score is 6 numbers relating to the gum health of the upper sextants and lower sextands. The score ranges in each sextant from 0 to 4.
0 means perfect health, 4 means severe gum disease issues around that tooth. This is used to record the health in different areas ranging from inflammation to bone loss. A regular score helps track health and is generally recorded during a routine dental exam.
#15 Aligner case
This is a plastic case used to store the aligner safely to avoid wrapping aligners in tissue paper and accidently losing them / throwing them in the bin.
Overall by learning these terms in the aligner glossary you are all clear on what you need to know about aligners before starting your own teeth straightening journey!

Not quite sure yet?
Fill in your email and we'll send you more details!


